Ubuntu administration
Step by step creation of a VMware Virtual Machine


Let us learn how to use VMWare to create a virtual machine. However, VMWare is not the only hypervisor which can be used to create a virtual machine

The first step is to download VMWare Workstation player for your operating system. You can download it from the VMWare website or another trusted software repository.

Step 2 : Start the VMWare Workstation player, then click “Create a new virtual machine”. You can launch VMWare Workstation Player by double-clicking the desktop icon or selecting it from the Start menu.
Click on “Create a New Virtual Machine” on the main screen of VMWare Workstation Player to launch the New Virtual Machine Wizard.
In step 3, select the ubuntu ISO image you downloaded earlier. You will use it here to install Ubuntu on your new VM. You have to select the operating system you will be installing and the version. If you do not see the exact operating system and version listed, select the closest match. Click “Next” when you have made your selection.
Click next to continue

Choose the type of installation media you will be using here as either a physical CD or DVD, an ISO image file, or a network location. This allows you to select a location for VMWare to place the virtual disks and configuration files as shown below.

Then, name the virtual machine and click next as shown below. The name can be anything you want, but it should be descriptive and easy to remember. The default location is usually fine, but you can choose a different location if you prefer.

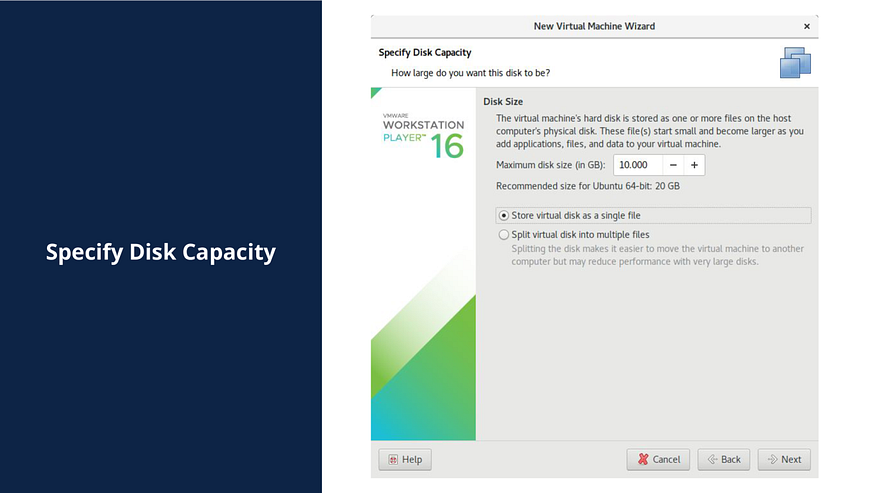
Then, specify the storage size. Note that, a minimal operating system can use less than 10 GB of storage space. You can also split the VM’s disk into smaller parts. Others may prefer one larger disk. You should also choose the amount of memory you want to allocate to the virtual machine. The default value is usually fine, but you can adjust it up or down depending on your needs. Make sure you leave enough memory for your host operating system to run smoothly as well.
Select the type of network connection you want to use for the virtual machine. The default setting is usually fine, but you can choose a different setting if you need to connect to a specific network or use a specific protocol.
Customize any additional settings for your virtual machine, such as hardware compatibility, USB device access, and CPU settings. This step is optional, but can be helpful if you need to optimize performance or functionality.
Confirm the settings then start the creation and installation by clicking on finish

Review your settings and click “Finish” to create your virtual machine. VMWare Workstation Player will create the virtual machine and add it to your library.
Once you have created your virtual machine, you can start it up and begin installing the operating system and any additional software you need. You can also customize your virtual machine settings as needed to optimize performance and functionality.
It’s important to note that creating and running virtual machines can be resource-intensive, so make sure your computer meets the system requirements for VMWare Workstation Player and allocate enough resources to the virtual machine to ensure smooth operation.
References:
- VMWare Workstation Player User Guide: https://docs.vmware.com/en/VMware-Workstation-Player-for-Windows/16.0/com.vmware.player.win.using.doc/GUID-157AE1F2-BCA9-423A-9D96-546B8FE23ECC.html